Showing posts with label tutorial. Show all posts

Sunday, January 19, 2014

Rubber Stamp..Fabric..and a Nice Chair Tutorial

Happy Sunday, all.....

Being the football girl I am at heart, I started out focusing on the New England and Denver Game, before this project took over. I was glad to see Denver win only because Tom Brady has been to the Super Bowl enough in his career. I was though disappointed in the game, it seemed as though Brady was lethargic the whole game, I keep wondering does he really wanna win. 

Now I watching Seattle, yes to Sherman, well they just fumbled which is a bummer....on that note...I will scream and yell during the whole game as my cat stares at me, wondering what is this woman's problem.

Okay, during the first game I decided to add some more detail to a chair I introduced you to awhile back. I don't plan any projects, being spontaneous a whatever hits me, I do. Today it was the chair...


I picked my fabric which is a simple cotton for a 20.00 chair find was good enough me, the chair, and someone else you'll see later. After trying many different rubber stamp designs, this fleur de lis seemed to work the best.


I took my plastic fabric measure, after cutting my fabric to the chair foot area, determined the spacing, and stamped it with black, then put it up to the chair and didn't like how light the stamping turned out. So...
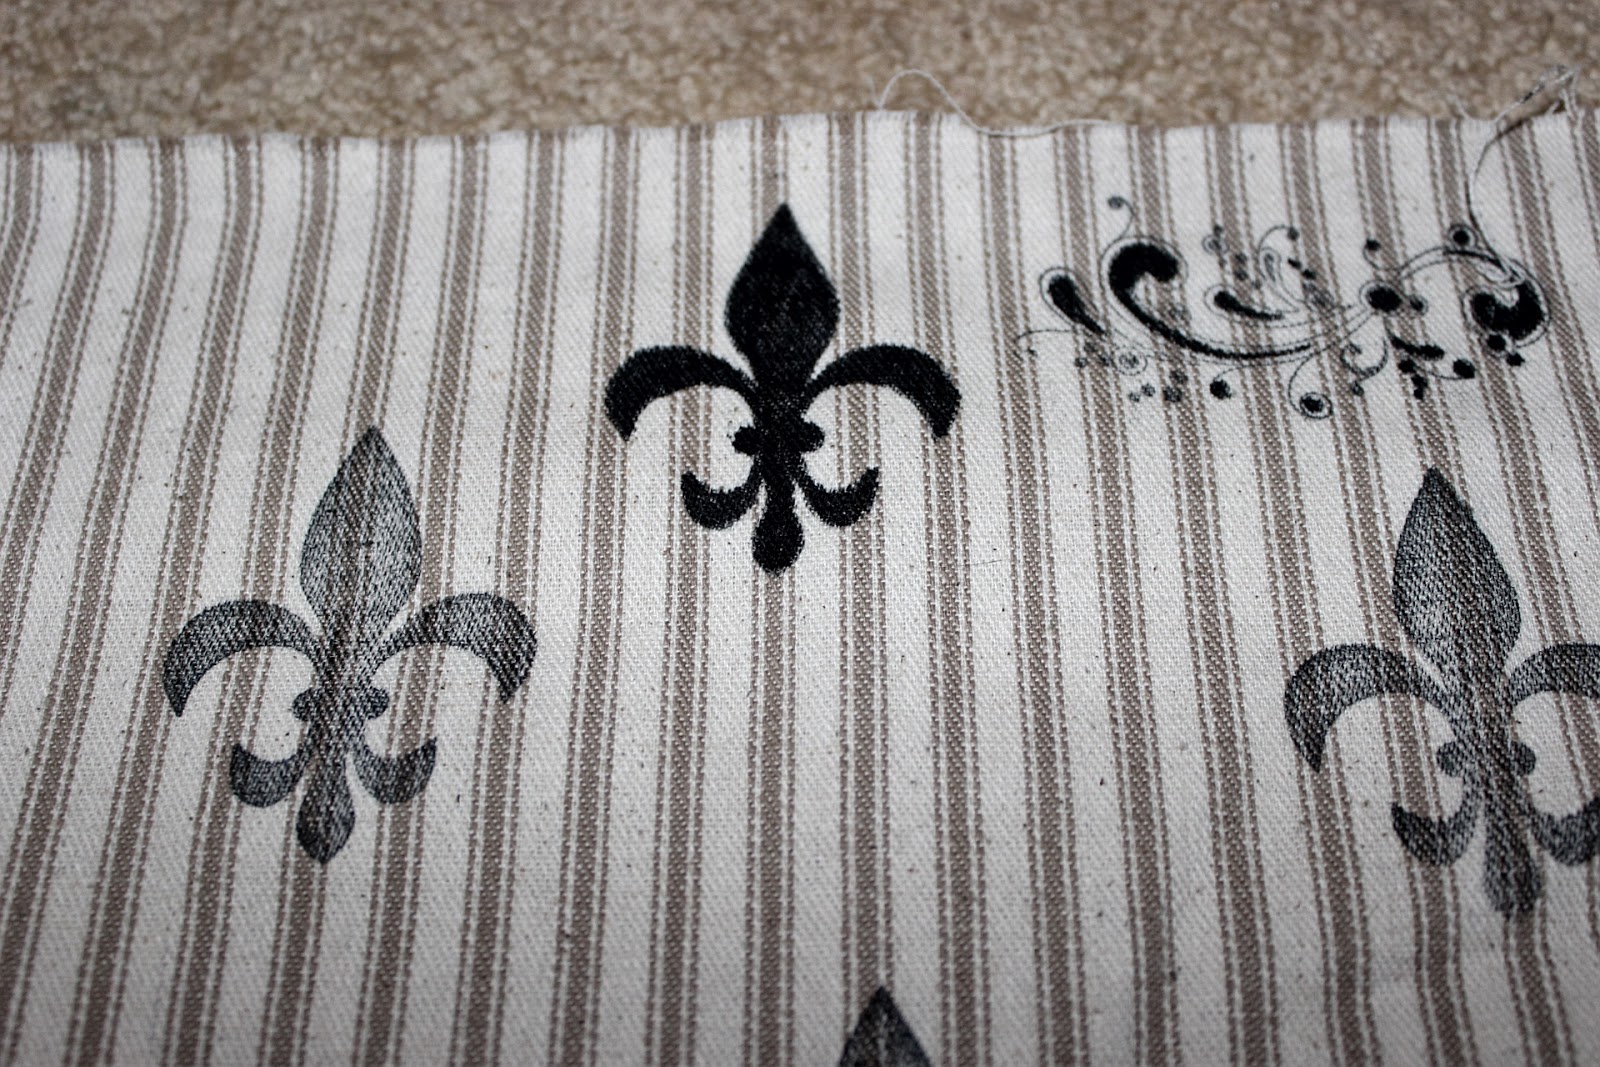

I took a black fabric marker traced, filled in all the designs, and heat set the design to the fabric. Much better for the chair without a doubt. Now the fabric is from Walmart, nothing fancy, simply a cotton beige stripe. Actually the fabric like everything else I do was chosen at random, just because I like the colors. It was not intended for the chair. I take my time when I do a project and let it come to life on it's own. That way I don't stress myself out trying to make choices and it's always works out for the best. Meaning it always turns out the way I like and the way it's meant to be. The fabric on the other hand being cheap was great for this little one...


Now being an empty nester one would think, okay, it's time for me to have nice things. After all the kids are grown, married and starting there own families. Which leads to some more exciting news. My daughter had a baby in November of last year, little Will. Then I believe I mentioned my oldest son is having a baby girl due the first week of April. Well, my second oldest son, is also having a baby girl due May 30th.

 I was just notified yesterday, why so late...well a couple weeks ago my son tried to send me a photograph of the ultra sound, however, my phone wouldn't open the darn thing...so he said, you'll just have to wait...for what I said..he replied just wait...it seems they didn't know if the baby was going to make it in the beginning, due to complications with my daughter in law. And with my son working so much and wanting to tell me in person after the phone didn't work, he decided to wait while I sat and thought now what! Well, both mommy and baby are doing just fine. Three babies within say 6 months...wow...after 10 years of two grandson's I say I am really being blessed. 

Now as far as the one in the photograph...yes, my last child that won't leave home until old age...can be destructive. I keep her claws clipped yet she still tends to claw at my furniture anyway. I can't even begin to entertain the thought of having her claws removed, despite the fact she claws, they do belong to her...I know personally, I wouldn't want mine removed.


 I really liked the way it turned out, if you noticed the bottom piece, the chair does recline, the stripes are horizontal. I don't have a lot of the fabric and there was one piece that fit perfect. Beside it goes up under the chair in the upright position, so who cares, I can live with it, and that's all that matters. A lesson was learned during the process, oh yes, I didn't realize the top front piece came off the chair like the bottom one, hence, it took me longer to upholster the front piece. Duh! I now know how I am going to finish the rest of the chair.


I am pleased, although being OCD I find myself looking at the fabric and noticing the one fleur de lis out of place. See if you notice! I'm saying again..I don't mind I can live with it! As much as I am a simple, practical girl, I find myself decorating in a traditional manner. No matter how hard I try to add color, no matter how hard I try to decorate, rustic, eclectic, without a doubt not fancy, no frills, and lace with this girl, I always end up a bit more traditional. See how I decorate, notice the table next to the chair? Living in a small apartment one tends to utilize every space, it's paper mache round boxes, painted black, with a round piece of stained wood on top. Boxes store some of my crafts. Now, I just need to get to the fabric store and purchase the batting, padding, needed to complete the seat, and the arms. Would someone move the out of place fleur de lis to the right please! 


Saturday, January 4, 2014

Easy long tail cast on knitting tutorial


I am re-visiting a long tail knitting cast on. I know has been done many times in the past, however there are many people out there that still have not caught on to the idea, of exactly how it works. Maybe its' too tight, so you give up and do the traditional cast on instead. I know I did it many times too tightly, I've grown to love it and use it all the time.


Here I am beginning a new knitted hat using Wool Ease thick n quick yarn by Lion Brand.
Once you make your beginning slip knot and place it on your needle. Lay the yarn over your open, left palm (right if you're a left handed knitter) with the cast on needle behind as shown.


Open your four fingers as shown and place the yarn at the bottom of the photograph through your pinkie finger and close it. This will hold the yarn that is loose and coming off the ball of yarn.


Here it shows you how the yarn looks between my third finger and pinkie finger. This is how it should look at this point with the cast on needle still in the front as in the first photograph.


 Now pick up the cast on needle take it around your index finger from behind, bringing it through your index finger and your second finger, creating a loop.


This is how it will look when the cast on needle is done correctly. The cast on needle with be in the front with the yarn through your index finger and second finger making the loop.


Take the cast on needle over your thumb and rest it a surface as shown. You will see now the yarn is going from the space between the index finger and second finger, over your thumb.


Pick up the cast on needle bringing it toward you around your thumb on top of the yarn, creating another loop. It should look exactly like the photograph. 


Next take your knitting needle point and put it through the yarn at the back of your thumb, lifting the needle straight up and off your thumb.


It will look something like this....


Simply pull your yarn and tighten the loop on to the knitting needle. That's it! I noticed this is a tight cast on which was the problem I had with this particular technique. So, what I did, if your using say a size 15 needle step down to a 13, it makes it much easier to get through the tight cast on and begin your row. 

Same works for all cast on needles. Cast on with a size 6, take a 5 and do your first row then go back to your 6, often I will do one more row with the smaller needle. I am a person when casting on and knitting my first few rows, does it too loose. This really helped me work it out. I hope this helps those who are having trouble with this technique, once you get it down, you'll love it!

Update...continue just wrapping the yarn around your thumb as in photograph number 7, once you put a cast on stitch on the needle, simply take your needle, give is a bit of a tug to release more yarn through your pinkie and index finger, wrap around your thumb to work another cast on stitch. and working it on to your cast on needle until you have the number of cast on's your pattern requires.


 As your knitting your cast on row it will often look like there is a big space between the stitches. This is okay, in fact, this was another reason I gave up, I thought it was to long and wrong. It's not, just pull it a bit tight and...


continue knitting on....


Thursday, February 7, 2013

Lavender Tutorial

 
Isn't this jar just too cute...I am so obsessed with them they are tiny Atlas ball jars. Yet, it's not about the jar it's about the Lavender inside.
 
 
Today I was busy removing the Lavender from there stems. If you grow lavender make sure you leave a bit of stem and do not throw them out. you will find out as your read. Those of you who think you can't grow Lavender not to worry it's fairly easy. I have grown it before at a previous home, and it did very well. It's also lends an amazing aroma and gorgeous view. It loves a bit of lime in the soil, yet still the same, it's quite forgiving.
What your are viewing.. 4 different types of Lavender, please don't ask, Ms. doesn't document everything forgot to write them down, and the detail is on the sticks outside buried in the snow. Make note to self...Write things down or go get the receipt...ah, maybe later.
  
 
Wow, I thought I pulled off a pretty good magic trick, the disappearing act, much to my own surprise it's just a paper towel over the lavender. I'm preparing the method of removing the lavender. Some use towels, me, no, I just use paper towels.
One on the bottom, one on the top and the beauty of the paper towels, when I am done with all the lavender, I have two gorgeous smelling paper  towels.
Folded 4 ways stick them in a zip lock bag for a few days and walla, great smelling dryer sheets. Waste not want not. Right!
  
 
Let's continue...next I take a rolling pin, looking at the words rolling pin just says weird, doesn't it? Rolling pin...it's the pin part that gets me. It is rolling pin, right?
Taking both palms of my hands lay them on the roller and gently roll back and forth, taking a few peeks to see how it's coming along.
  
 
After you're done begin picking up the stems. You will find some lavender still attached just pull them off, but don't, throw away the stems. They have a wonderful purpose.
 
 
Once you have them all gathered take out some raffia, holding the end at your fingertips, stretch it to the top of your shoulder. Don't cut it yet, measure another piece the same length, roughly 72 inches. Seems like a lot I know, but it's not.
Center the raffia under the stems as shown in the photograph and begin wrapping it around the stems, leaving enough to make a nice little bow.
 
 
This is what it will look like when done. Now for the fun part! Most people don't know that Lavender stems, in fact, the whole plant not just the buds contain the scent. If you have a burning fireplace, wood burner, and in the spring through fall simply throw the wrapped bunch in a fire and walla, your house is sure to smell of lavender. Even your fire-pit outside. So waste not want, don't throw them out until you burn them out.
 
 
For those who wonder where I got the little atlas ball jar in the first photo. At the grocery store in the spaghetti sauce isle, are these tiny little ball jars called Classic Pesto, of course, this one contained ready made Pesto. There are others that are different pasta sauces that are delicious, and when they are on sale I grab them up. They're just too cute! The only problem none of the canning lids fit them. I just wash and save the lids, you  can use them for so many things. Just let  your imagination go!
 
In my section Everything Lavender I will be adding some really cute items soon. So stick around lots more to come!